Introduction
Air tracks are essential for gymnastics, parkour, and home workouts—but even the toughest inflatable mats can develop holes from sharp objects, friction, or wear. Instead of replacing your mat (a costly solution), a DIY repair is quick, affordable, and effective. This guide breaks down the 8-step process to fix air track holes, with clear instructions, tool recommendations, and pro tips to ensure success.
Table of Contents
- Why Timely Air Track Repairs Matter
- 8-Step Air Track Hole Repair Process
- Essential Tools for Effective Repairs
- Common Questions & Troubleshooting
1. Why Timely Air Track Repairs Matter
1.1 Cost-Effective vs. Replacement
Replacing an air track can cost $300–$800, while a DIY repair kit (glue + patch) averages $15–$30. Fixing small holes early prevents them from expanding into irreparable damage, saving you hundreds.
1.2 Safety & Performance
Unrepaired holes weaken your mat’s structure, reducing cushioning and increasing injury risk. Moisture trapped in holes also leads to mold growth, compromising hygiene.
2. 8-Step Air Track Hole Repair Process
Step 1: Locate the Hole
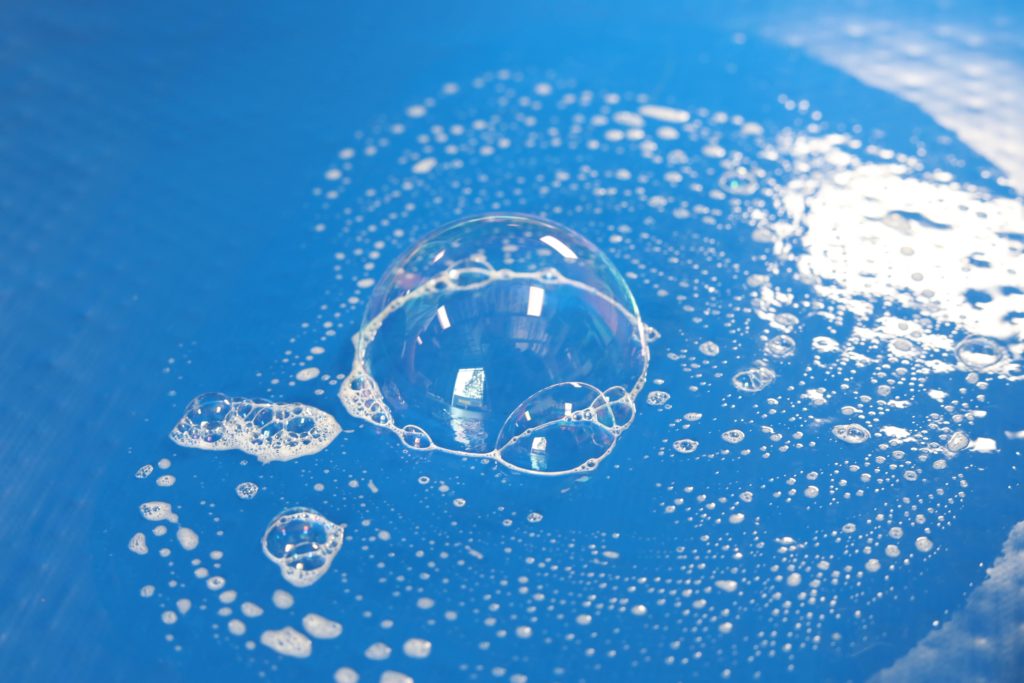
Before repairing, you must find the leak. Here’s how:
- Inflate the mat: Fully inflate it to 80% capacity (over-inflation makes the hole harder to spot).
- Mix soapy water: Combine 1 cup warm water + 1 tbsp dish soap in a spray bottle.
- Spray and inspect: Mist the mat’s surface, focusing on high-friction areas (edges, seams). Bubbles will form where air escapes—mark the spot with a washable marker.
Step 2: Clean & Dry the Area
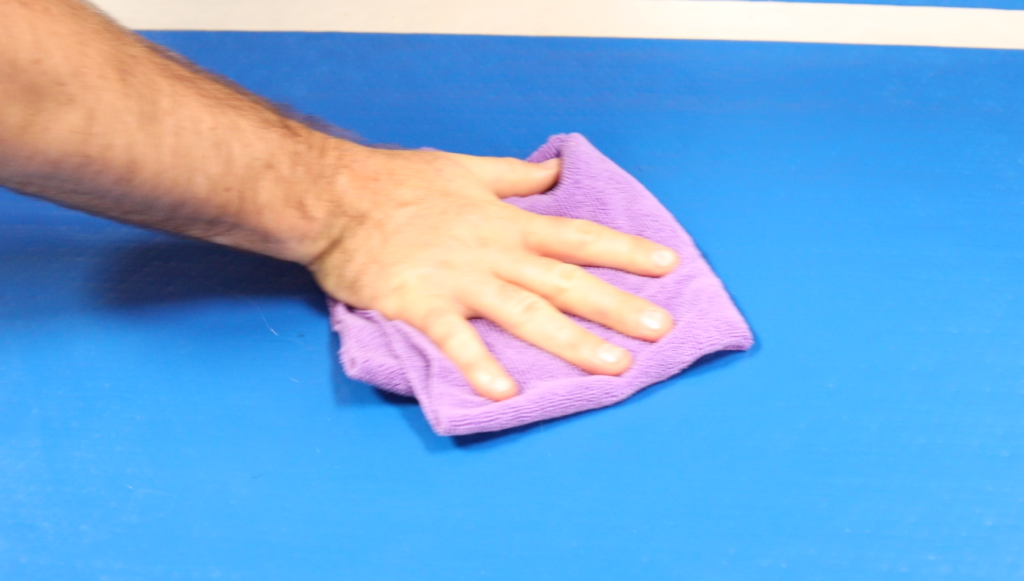
A clean surface ensures your repair sticks. Follow these steps:
- Deflate slightly: Let out a little air to make the area flat and easy to handle.
- Wipe with alcohol: Use a cotton pad dipped in isopropyl alcohol (70% or higher) to remove dust, oils, or sweat. Avoid water—moisture weakens glue adhesion.
- Dry completely: Let the area air-dry for 10–15 minutes.
Step 3: Choose Your Repair Method
Your repair type depends on the hole’s size. Use this table to decide:
Step 4: Size & Customize Your Patch
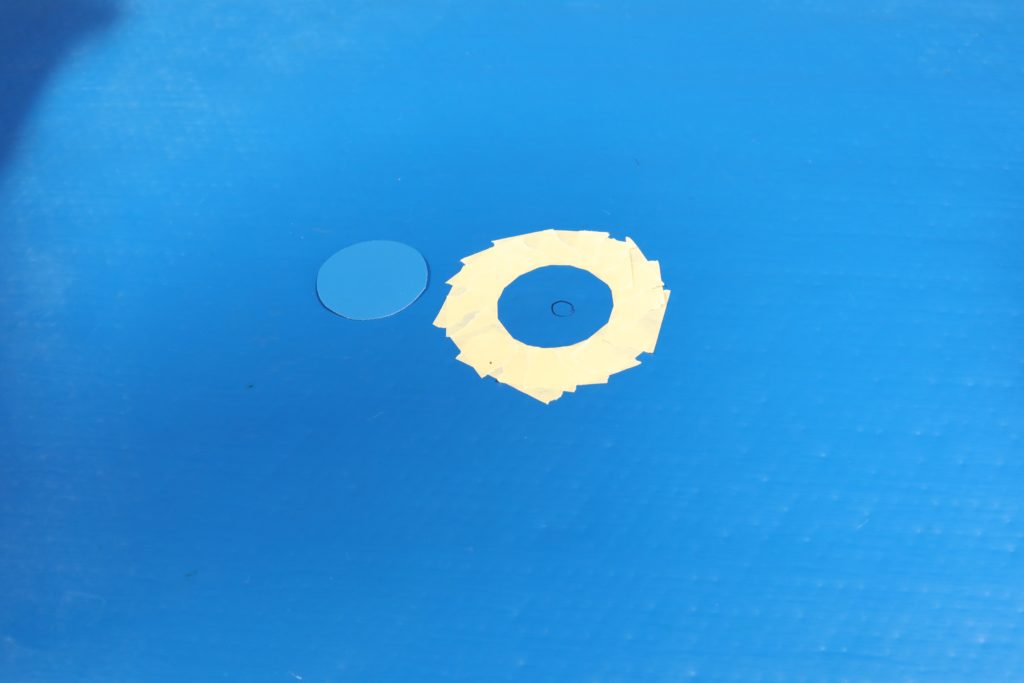
For patch repairs, size matters:
- Cut the patch: Trim a vinyl patch 2–3 inches larger than the hole (e.g., a 1-inch hole needs a 3x3-inch patch).
- Round the edges: Cut corners into curves to prevent peeling (sharp edges catch on surfaces).
- Test fit: Place the patch over the hole to ensure full coverage.
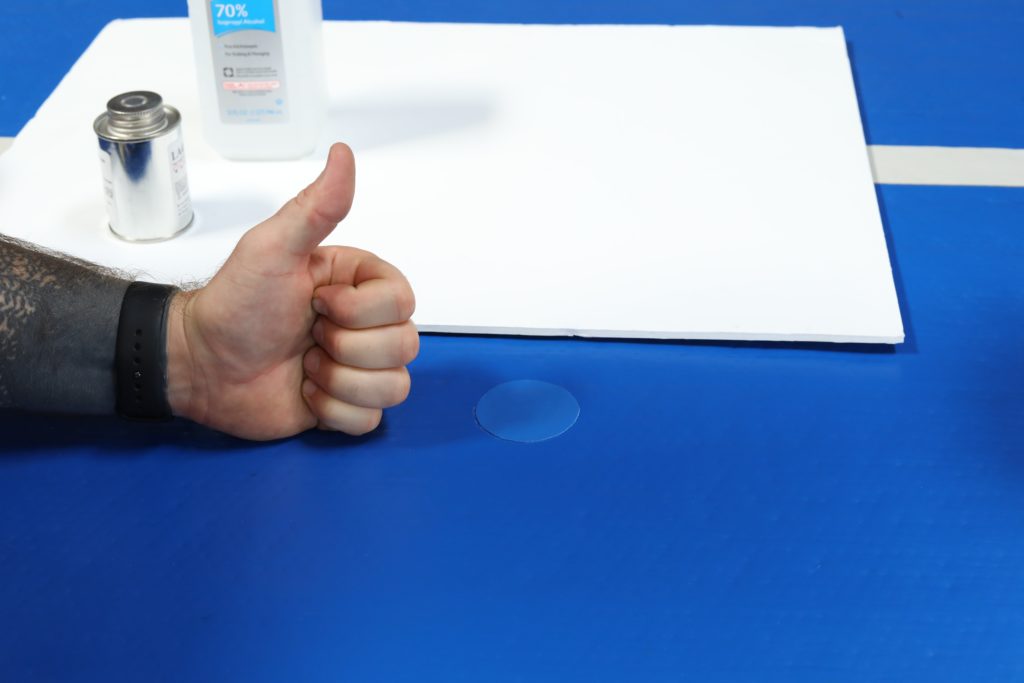
Step 5: Apply Glue & Let It Dry
Glue application varies by repair type:
For Liquid Sealant
- Shake the spray can for 10 seconds.
- Spray a 2-inch circle over the hole, covering it completely.
- Let it dry for 1–2 hours (check the product label for exact time).
For Patch Repairs
- Apply glue to the mat: Squeeze a thin, even layer of AirHead Adhesive onto the cleaned area (avoid globbing—too much glue weakens the bond).
- Apply glue to the patch: Spread a matching layer on the patch’s adhesive side.
- Let glue “tack up”: Wait 2–3 minutes until the glue feels sticky (not wet).
Step 6: Apply Pressure
Pressing ensures the patch bonds tightly:
- Align the patch: Center it over the hole, matching edges to the marked area.
- Press firmly: Use a rubber roller or your palm to apply even pressure for 2–3 minutes. Focus on the edges to prevent bubbles.
- For seams: If the hole is on a seam, bend the mat slightly to press the patch into the crease.
Step 7: Perform a Patch Check
After 2–3 hours (when glue is fully cured), test your repair:
- Re-inflate the mat to 50% capacity.
- Respray soapy water over the patch.
- No bubbles? Success!
- Bubbles? Repeat Steps 2–6 (the glue may not have bonded properly).
Step 8: Re-Inflate & Enjoy
Once the repair passes the bubble test:
- Fully inflate the mat to its recommended pressure (check the user manual).
- Let it sit for 24 hours to ensure the glue fully hardens.
- Your air track is now ready for use!
3. Essential Tools for Effective Repairs
3.1 Must-Have Products
- AirHead Adhesive: Commercial-grade PVC glue for strong, flexible bonds.
- Vinyl Patches: Match your mat’s material (e.g., PVC patches for PVC mats).
- Flex Seal Spray: Ideal for micro holes—quick-drying and water-resistant.
4. Common Questions & Troubleshooting
4.1 “Can I use super glue?”
No. Super glue is rigid and cracks under pressure. Use PVC-specific glue (like AirHead) for flexibility.
4.2 “My patch is peeling—what did I do wrong?”
Likely causes:
- The surface wasn’t clean (oils or dust prevented adhesion).
- The glue dried before pressing (reapply and bond immediately).
4.3 “How long will the repair last?”
With proper care, a patch repair lasts 1–2 years. Recheck every 6 months for heavy use.
Conclusion
Repairing air track holes doesn’t require professional skills—just patience and the right steps. By following this 8-step guide, you’ll fix micro holes, tears, and seams like a pro, saving money and extending your mat’s lifespan. Prioritize timely repairs, and your air track will stay safe, functional, and ready for your next workout!
Final Tip: Always store your air track deflated in a cool, dry place to prevent future holes. Happy repairing!


